This is the ninth and final post of the Carefully Curated Series for the Spring 2024 semester.
*Disclaimer: This is NOT an advertisement for Adobe Character Animator. I just find this particular software tool to be a really engaging way to create fun and interesting characters to improve student engagement in online classes. It’s also available to users at CSUCI.
Online classes could mean so much more than going through the motions of reading/watching the lectures and doing the assignments. Why not add some character to those lecture recordings? If you want to increase student engagement with your online class material, perhaps it’s time to add pizzazz to your content with a fun little character.
Adobe Character Animator can do just that!
If you’re anything like me, where the best thing I can draw is a stick figure, Adobe Character Animator offers preset characters ready to use and record. Additionally, you can even customize the preset characters using Adobe’s Puppet Maker Template.
Watch the video below for a sneak peek into the creative possibilities of what YOU could do with Adobe Character Animator!
Pretty awesome, right? Adobe Character Animator draws on the power of Adobe AI technology to radically reduce the amount of time and effort it takes to create lip-sync animation. This AI feature helps Character Animator recognize certain speech movements, not just through face recognition using your webcam but also through audio recognition of certain speech pronunciations.
Starter Mode
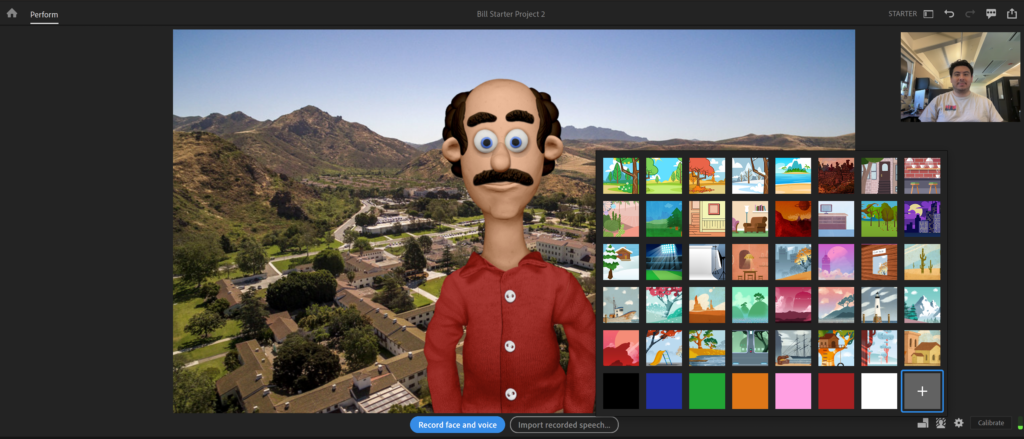
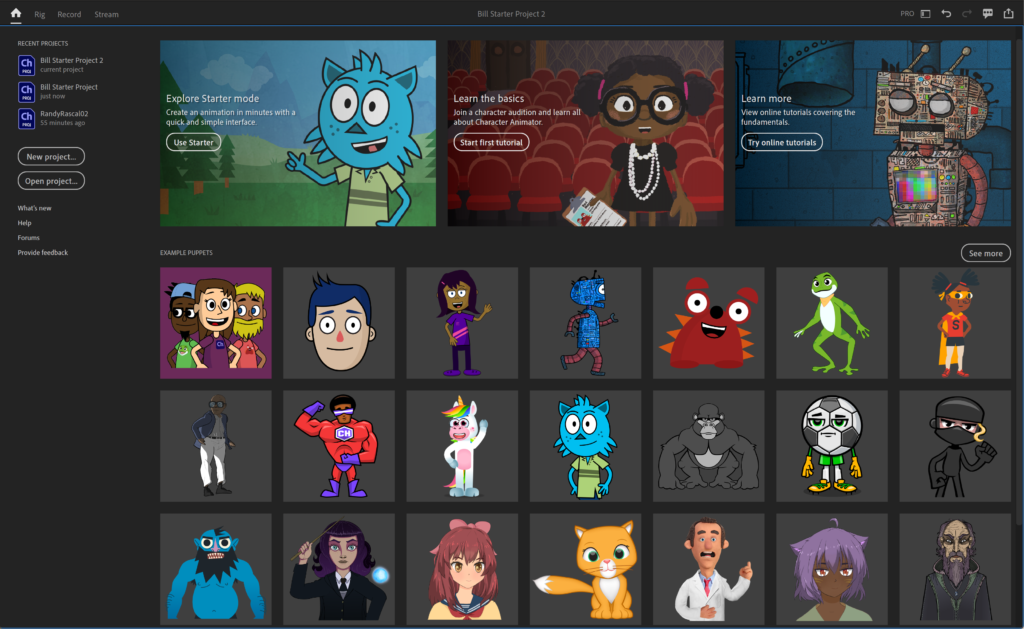
Learning new editing programs can be time-consuming and intimidating; however, when you open Adobe Character Animator for the first time, you will be launched in Starter Mode. Here, you will be met with 33 puppets, all ranging from full bodies to half bodies, ready to be puppeteered into your lectures.
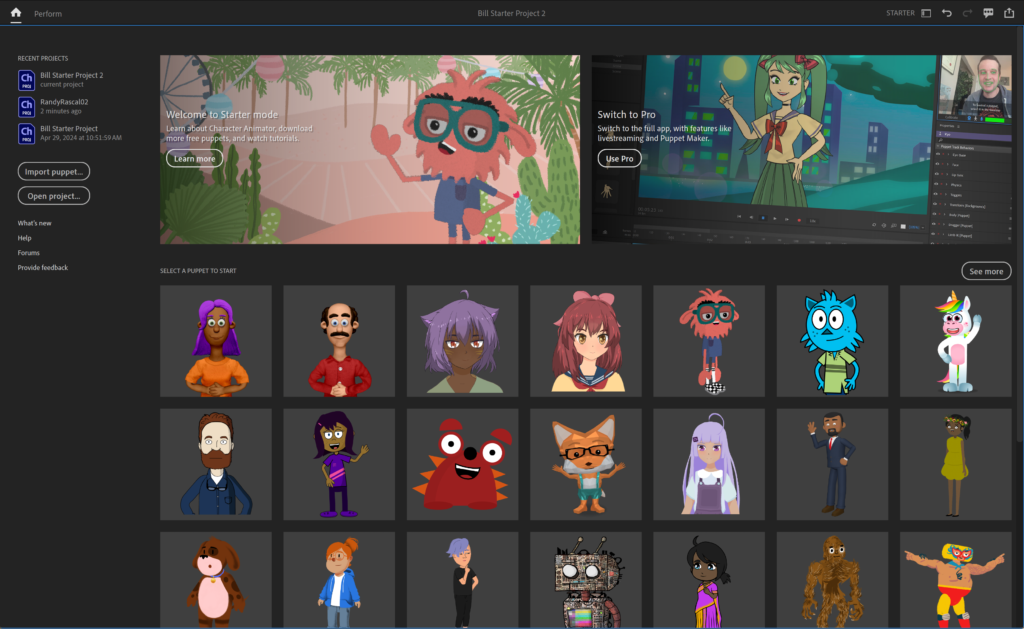
Using a starter puppet is easy! The purpose of Starter Mode is to avoid feeling overwhelmed by the plethora of editing tools and features in most Adobe applications. It is a simplified interface where all you have to do is choose a character and begin recording using the Record Face and Voice feature. So get those USB webcams and microphones ready because it’s very much a plug-and-play situation!
There is also an option to Import Recorded Speeches, so you can turn your old lectures into new and fun educational media!
*Disclaimer: Only audio files such as .wav, .mp3, or .aif can be used with the Import Recorded Speech function. Any pre-existing video would need the audio exported into one of the formatted audio files.
Features in Starter Mode
Orientation
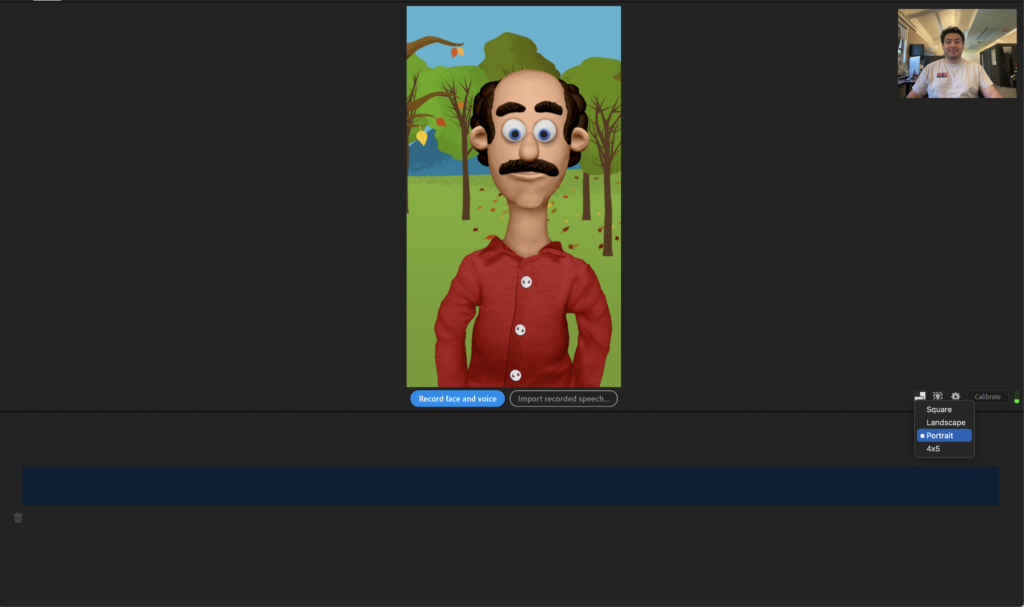
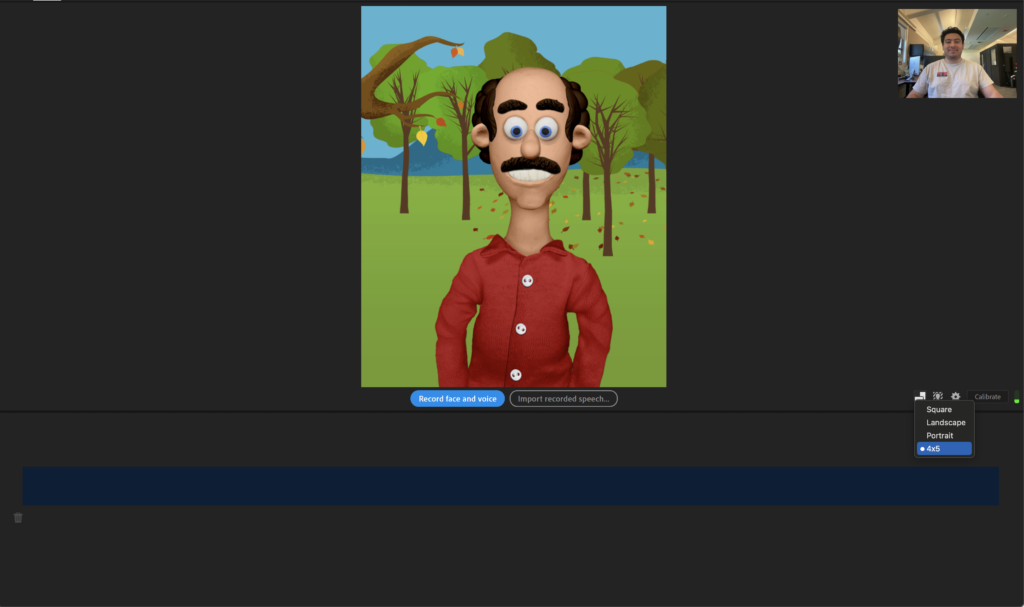
When choosing the orientation of your video, Adobe Character Animator has a variety of different options to choose from, such as:
- Landscape
- Square
- Portrait
- 4×5
Landscape is the standard 16:9 TV or computer screen style format selected by default and will be used 95% of the time. However, in today’s age of social media and vertical videos, orienting your videos in Portrait might improve students’ Attention rates.

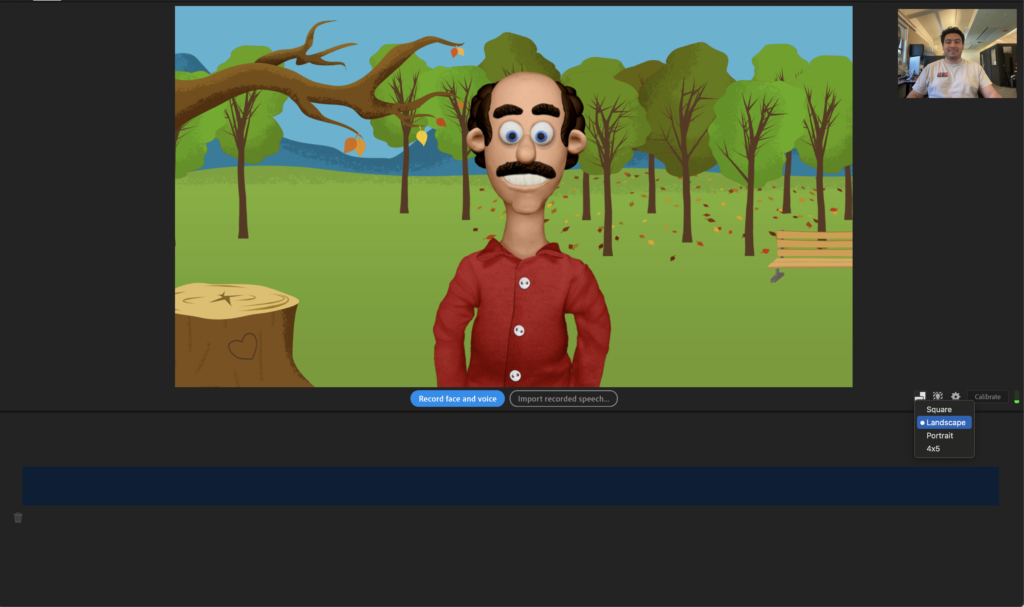
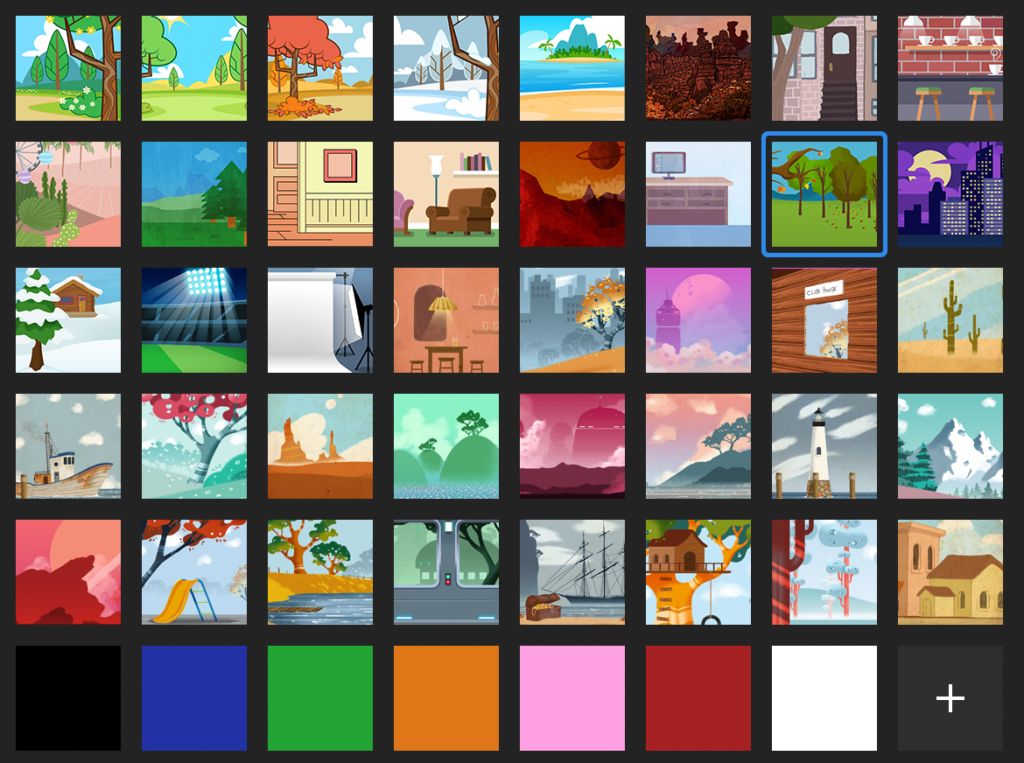
Background
By default, your character will be set in a woodsy/park location, but that can be changed with the “Background Feature, which offers a wide variety of scenery. Additionally, there is also a custom button where you can upload your own background image.
The Background feature will be the function you will use the most because it is the one place where you can change your character’s scenery. This will be key in making your lectures more engaging!
One thing you should be aware of is that Starter Mode only allows for one background image per recording. This means that if you were planning to record a whole lecture using images from a PowerPoint slide, that would not be possible. However, this is a feature in Pro Mode, which we will cover in the next section!

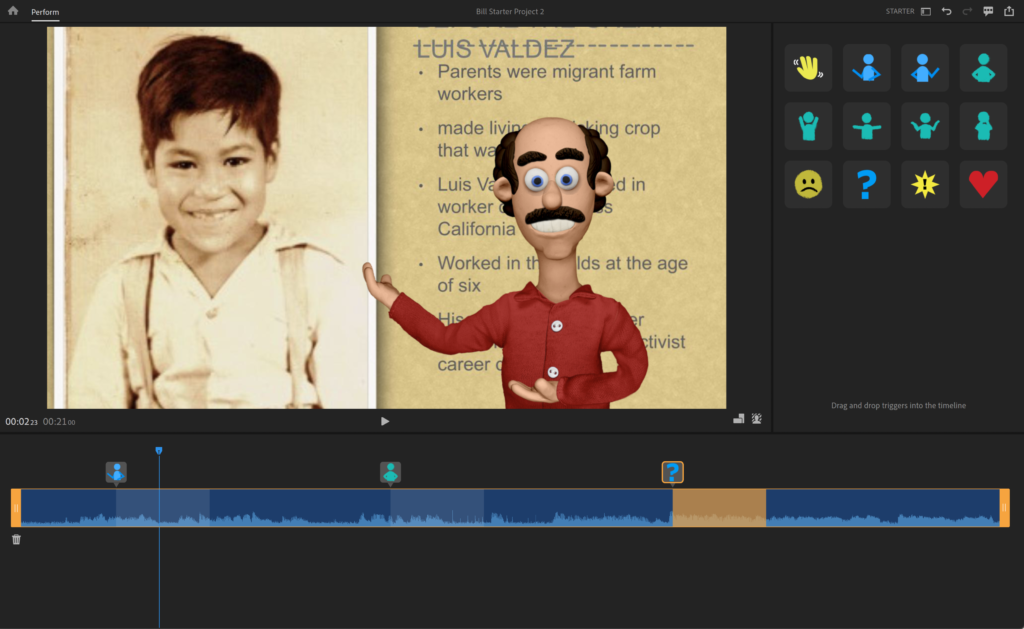
Triggers & Gestures
Ready to pull the strings of your puppet? The Triggers and Gestures function in Adobe Character Animator – Starter Mode offers a small selection of gestures and reactions that can be triggered in the timeline of your video.
Reactions
- Sad
- Question
- Exclamation
- Hearts
Gestures
- Wave
- Gesture Right
- Gesture Left
- Hands-on Stomach
- Hands Up
- Arms Out
- Shrug
- Yell
Simply drag the reaction or gesture onto the timeline; you can stretch the reaction and gesture in the timeline to how long you want them to last. These triggers can be a great way to react or gesture to important moments in your lecture that you might want your students to pay attention to.
Pro mode
Starter Mode does have its limitations in terms of creativity and lacks functionality when trying to personalize your creative process, but Pro Mode is where the true fun begins! In Pro Mode, you will have access to Adobe’s Character Animator full functionality. You’ll get all the bells and whistles!
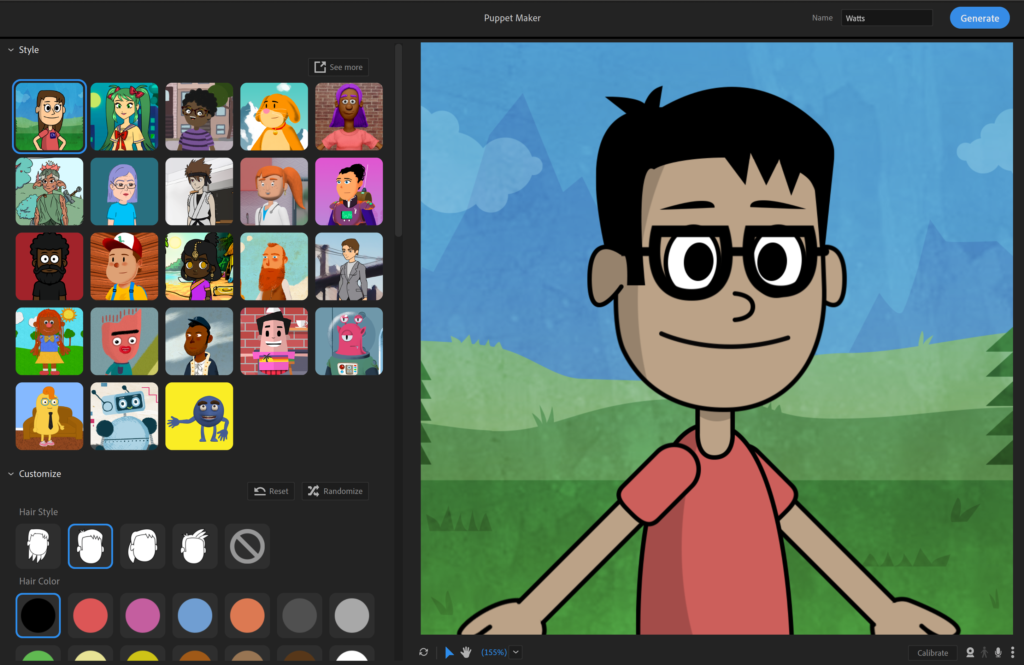
Like in Starter mode, you will immediately be presented with 21 characters all ready to be puppeteered, with the additional option to customize your own character using the Puppet Maker feature.
In Puppet Maker, you will be given access to 23 customizable characters. All available features to customize are listed below:
- Hairstyle
- Hair Color
- Hair Props
- Skin Color
- Eyebrows
- Eyelashes
- Eye Color
- Eyewear
- Nose
- Facial Hair
- Shirt Design
- Shirt Color
- Play
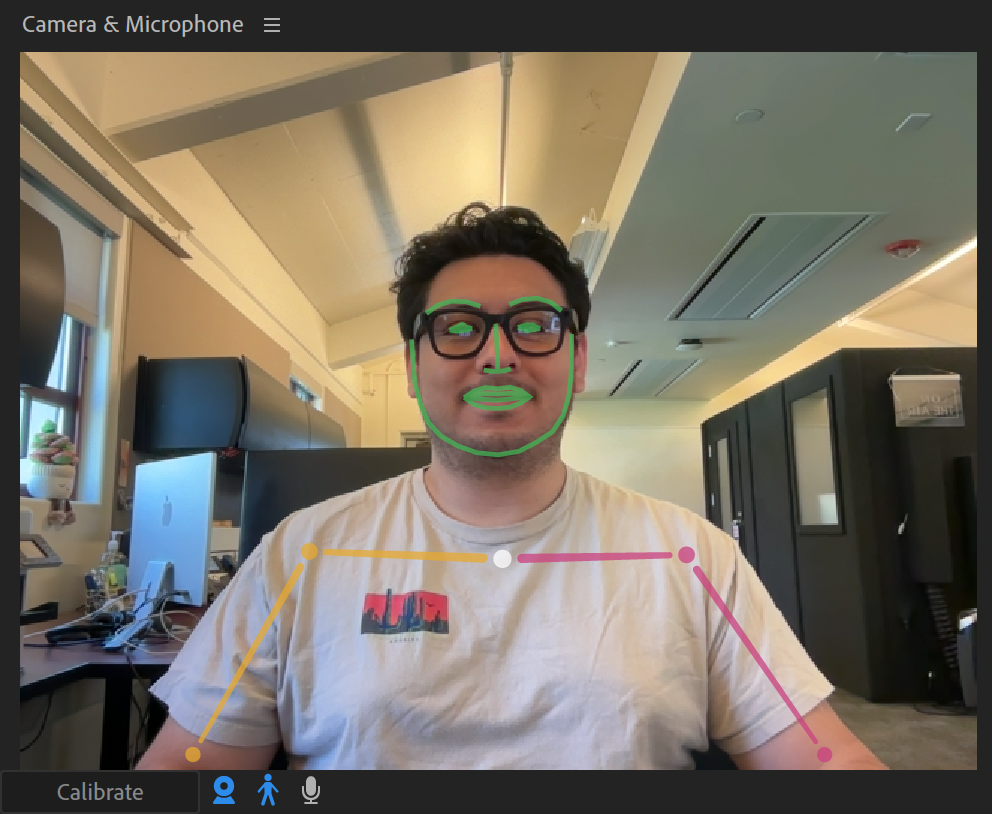
Unlike Starter Mode, Pro Mode will actually capture your character live! Using your computer’s built-in webcam and microphone, Adobe Character Animator automatically tracks your movements and matches them with your character. This will allow for a live recording of your lectures!
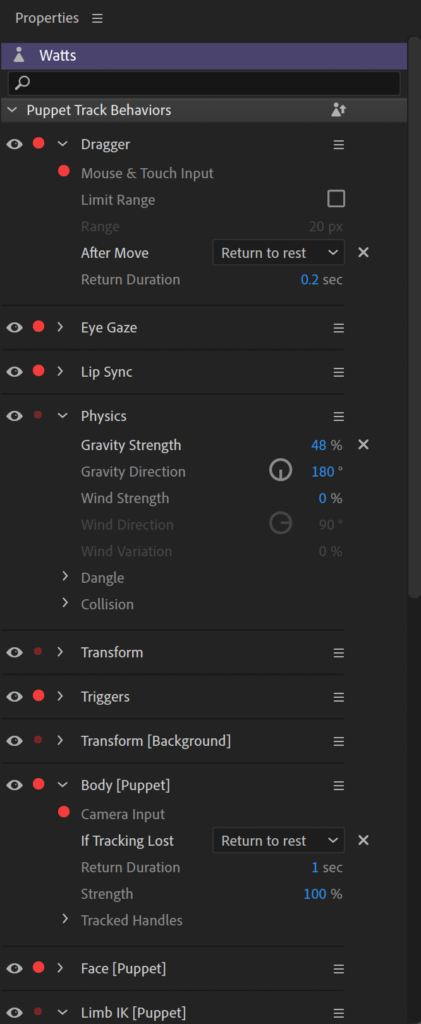
Properties Panel
You will also notice the Properties panel, which allows you to customize your puppet’s track behaviors. These behaviors include Dragger, Eye Gaze, Lip Sync, Physics, Transform, Triggers, Body, Face, and Limbs.
I know it looks intimidating and overwhelming, but I promise it’s a panel you’ll almost never have to touch unless you want to make tweaks to your puppet.
The only behavior you will focus on is the transform behavior. This will allow you to adjust your puppet’s size and location on the screen, as well as the size of your background.
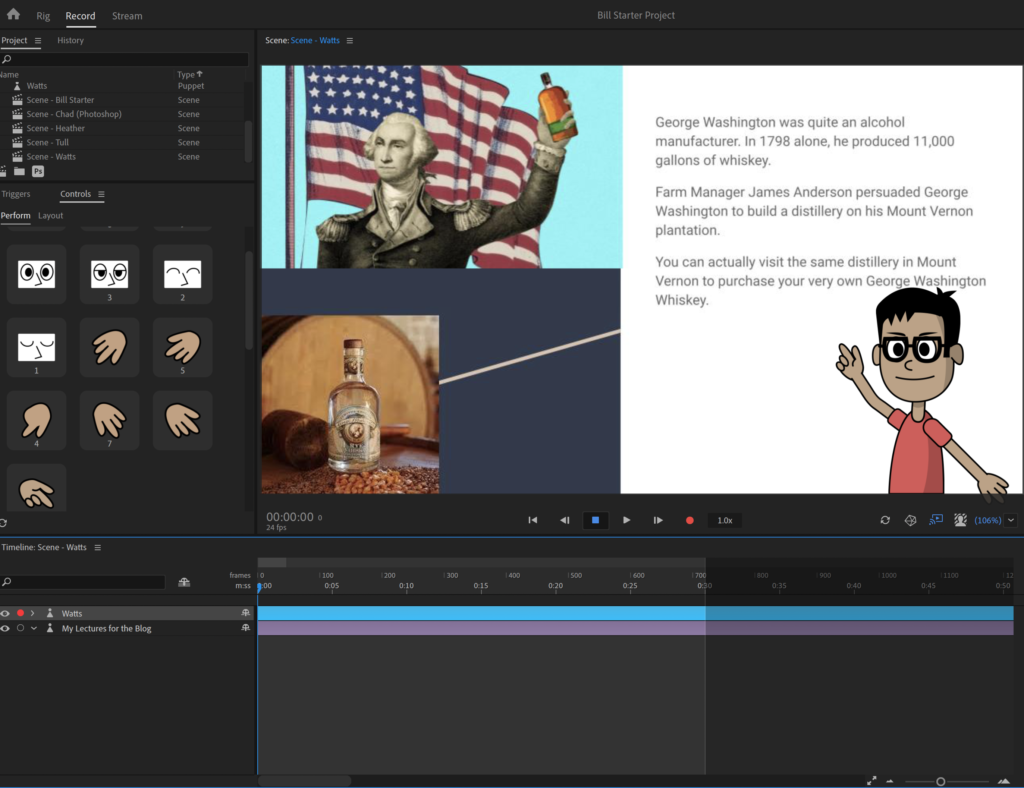
Now that you have your puppet in the editor, calibrated all their settings, and imported your PowerPoint images into the program, it is time to hit that record button!
There are still many more features in Adobe Character Animator to explore that could help broaden your creativity to the max, but for now, knowing the basics and how to get started with recording as soon as you launch the application will suffice.
If you are curious to learn more about Adobe Character Animator, I highly recommend checking out Okay Samurai on YouTube. It explains how to use Character Animator in depth.