This is the first post of the Carefully Curated Series for the Spring 2024 semester.
*Disclaimer: This is NOT an advertisement for Adobe Express. I find this particular suite of tools to be a really approachable way to create some graphics that will give an online course a visual boost. Adobe Express is available to users at CSUCI.
A great online course consists of many things: engaging content, sound pedagogy, and thoughtful course design. One additional element that often goes overlooked but also gives a course an edge is a consistent look and feel. However, after all the time and effort that goes into developing assignments and sourcing content, creating any sort of graphics or branding can feel like a daunting task. Especially if you’re someone who doesn’t consider yourself to be a creative person.
That’s where Adobe Express’s Brands and Logo Creator come in. These tools, coupled with Adobe Express’s templates, allow you to create a cohesive look for your course pages and content easily.
What is a Brand in Adobe Express?
A brand in Adobe Express consists of a few key components: a logo, fonts, and colors. Now, a lot of people would see the first component, a logo, and immediately think, “I can’t create a logo. This isn’t going to help me.” But that’s where Adobe’s Logo Creator comes in. With a few text inputs and clicks, you can have a library of logo options created for your course.
Logo
For example, let’s say I was teaching a course called Film 101: Introduction to Filmmaking. I can go to the logo creator, tell it that my industry is Education, give it the name of my course, choose a style, such as Bold or Elegant, select a video camera icon, and boom! I have a page of different logos that I can easily choose from. I can even use one of these as the course card image on my course in Canvas.
After selecting one of the generated logos, I can download it, and I’m ready to use it in my brand. The great thing is that when you download the logo, you’ll get a zip file containing a few different versions, such as a black version with a transparent background and a white version with a transparent background. These make it easy to add your logo to any number of templates with different background images and colors.
Colors & Fonts
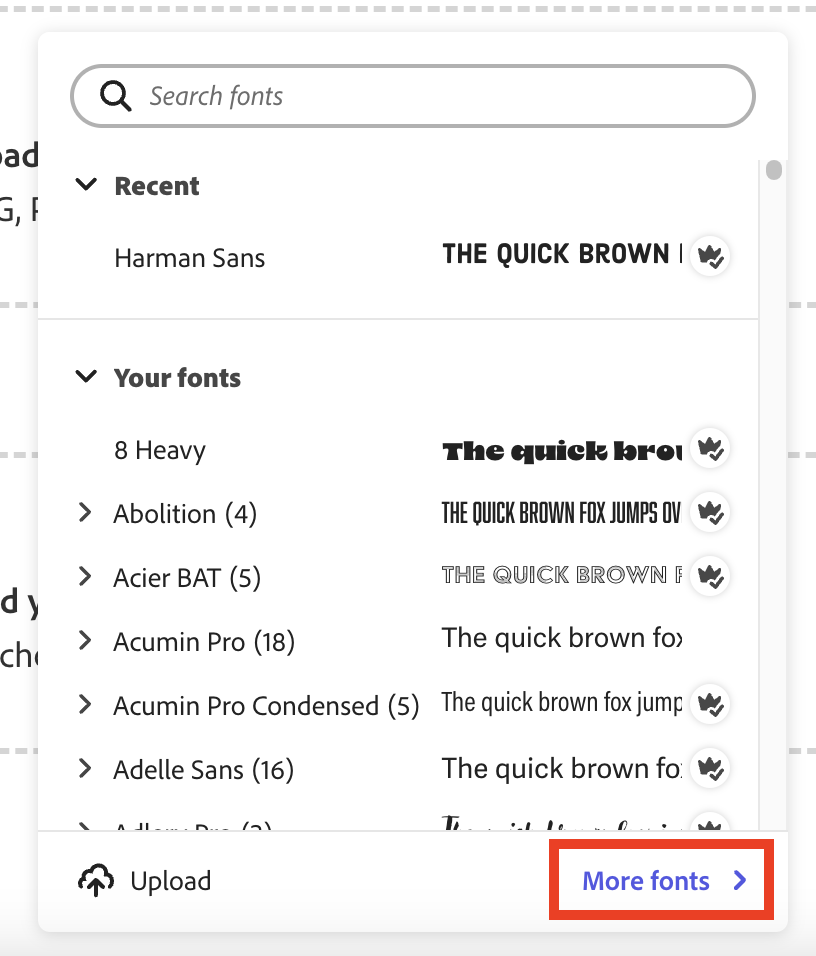
Choosing the right colors and fonts for your course’s brand will further set the aesthetic of your course design. One of the best parts of using Adobe Express is that it gives you access to a huge library of fonts to choose from. When building your brand, simply click the Fonts section of your brand to browse the library of fonts available.
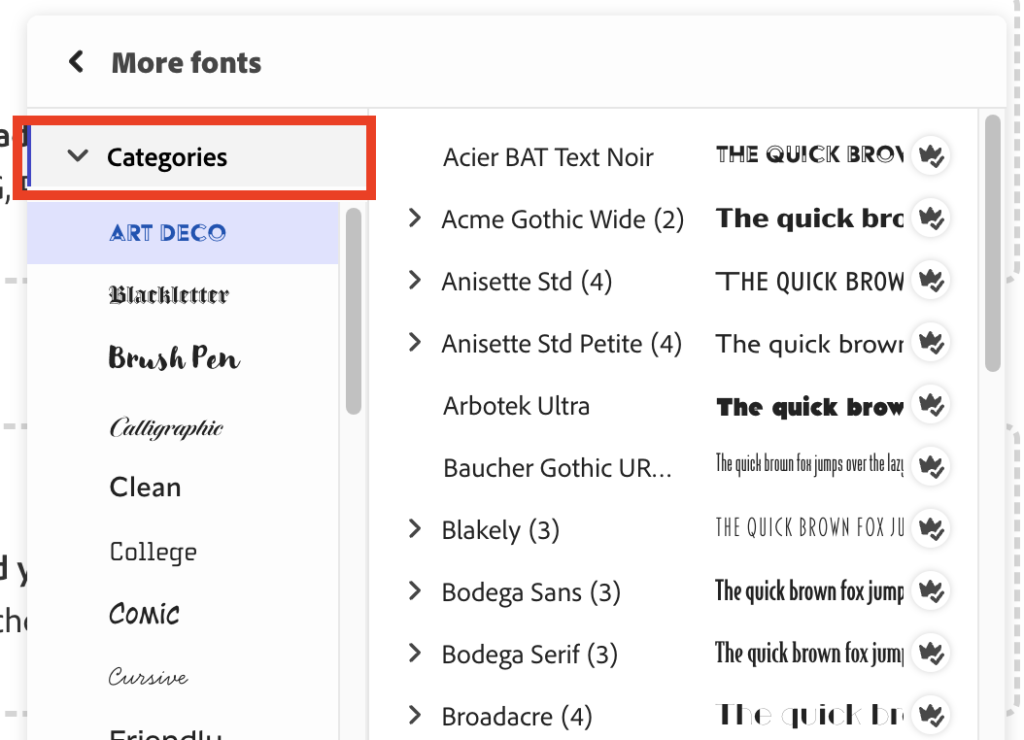
Pro Tip #1: After clicking the Fonts section to launch the font browser, click “More Fonts” in the lower right corner, and then you’ll be able to expand the “Categories” option to filter fonts by different styles, such as “Clean,” or “Typewriter.” (a couple of my favorites).
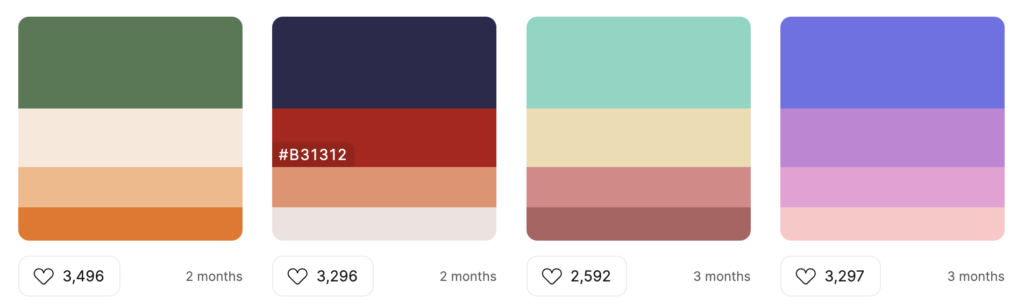
Pick a couple of different fonts to use as part of your brand, and then you can move on to colors. Adobe Express’s brand creator gives some recommended color swatches once you start building your brand and also allows you to pick custom colors.
However, I find that using a site such as Color Hunt is much more helpful in picking a color palette for your brand. Using Color Hunt, you can easily find a palette that speaks to you, copy the color codes, and paste them into Adobe Express to add them as part of your brand.
Other Elements of a Brand in Adobe Express
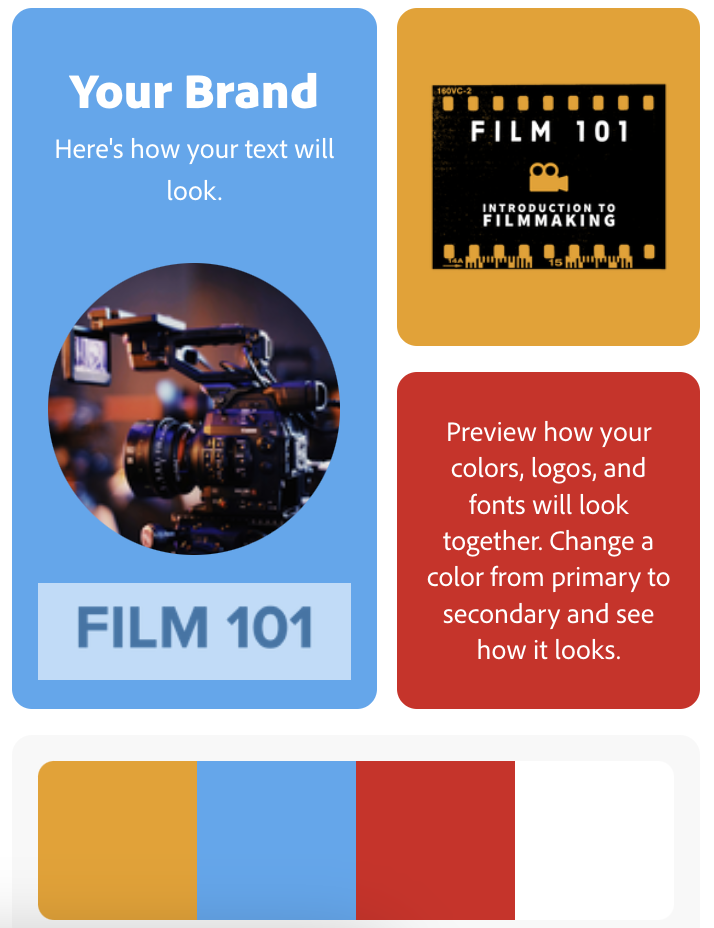
When building out your brand, you’ll notice a couple of other categories to add to: templates and graphics. These are both optional but can help build up the brand preview that begins to populate as you add to your brand. The graphics section, at least when starting, is more important than templates since you’ll build templates with your brand once it’s finished, but adding a few pictures to the graphics section can make the brand feel more complete.
Again, these are optional, but you’ll see how the preview begins to look more complete with some graphics added to the brand. Check out the example below for the Film 101 course.
Applying a Brand to Templates
Now that your brand is complete, you can easily apply aspects of it to different templates in Adobe Express. One of the simplest and most useful things to do with all of this is to use Adobe Express to create a course card image for your Canvas course.
I previously mentioned that you could easily use the Logo Creator to generate a logo and use that as a course card for your course, and you certainly can do that. But if you have a little extra time and want to give that extra bit of visual customization to your course, applying your brand to a template is the way to go.
While I’m not going to dive into the full details steps of how to do this in this post (you can check out Adobe’s Creating Templates video on YouTube for a full dive into creating a brand and applying it to a template), the general steps are these:
- Create a new project
- Pro Tip #2: For creating a Canvas course card, select the “Custom size” option and use 262px for the width and 146px for the height. This is the size of a course card in Canvas.
- Select a template that you like
- Change the fonts and colors of the template to use the ones from your brand.
- When you click the fonts dropdown, your brand’s fonts will appear at the top
- When editing the color of any part of the template, your brand’s colors will appear at the top
Once you’ve customized the template to be your own branded course card image, download it and then add the course card image to your course!
You can apply this same process of selecting a template and then applying your brand’s fonts, colors, logos, and graphics to create any number of graphical assets for your course. Using the brand elements will make it so that these visual elements have a consistent look and feel, which makes your course feel like a more complete and packaged experience for your students.